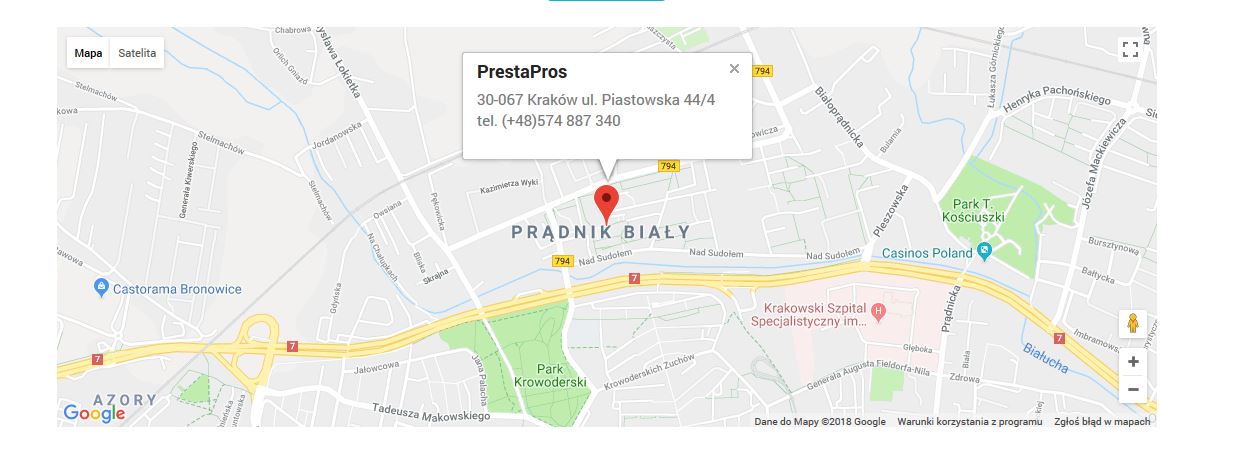
In this article we will present how to add a map to your contact page. The following tutorial was prepared on PrestaShop version 1.7+
To make changes you will need any ftp client (like Filezilla) and any program which allows to edit html files.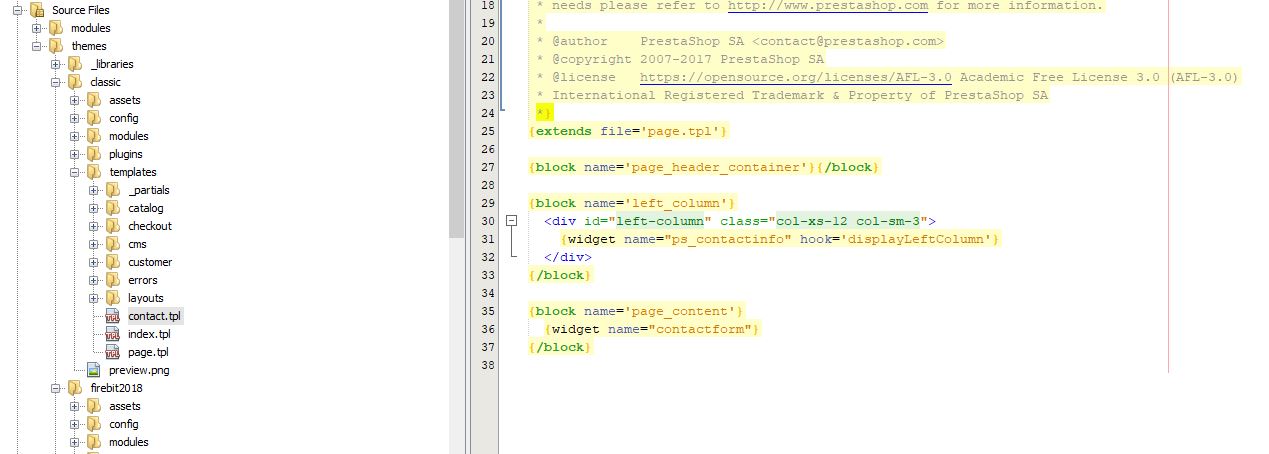
First step is to edit contact.tpl file in themes/NAME_OF_YOUR_THEME/templates/contact.tpl. Where NAME_OF_YOUR_THEME is template name which you use (or want to add map).
Add the following code in a place where you need a map to be shown. In our example we will paste code in content block
<section id="contact-map">
    <div class="row">
        <div class="col-12">
            <div id="googleMap" style="width:100%;height:400px"></div>
        </div>
    </div>
</section>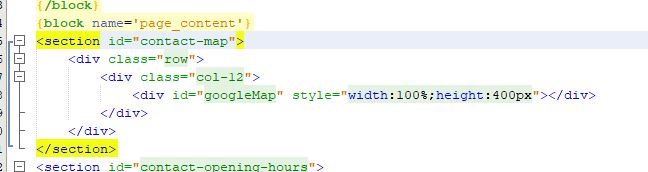
Third line determines full with container for all resolutions. In fourth line we show the place where google map will be set.
Next step is to add javascript code. Google maps library will be downloaded from google servers and settings will be stored in in google-map-contact.js in themes/NAME_OF_YOUR_THEME/assets/js/google-map-contact.js. Add mentioned file and paste following code:
function myMap() {

    var myLatLng = {lat: 50.0928392, lng: 19.9244297};
    var mapOptions = {
        zoom: 15,
        center: myLatLng
    }

    var map = new google.maps.Map(document.getElementById('googleMap'), mapOptions);

    var contentString = '<div id="content">' +
            '<h3>PrestaPros</h3>' +
            '<p>' +
            '30-067 Kraków ul. Piastowska 44/4<br>' +
            'tel. (+48)574 887 340<br>' +
            '</p>' +
            '</div>';

    var infowindow = new google.maps.InfoWindow({
        content: contentString
    });

    var marker = new google.maps.Marker({
        position: myLatLng,
//        icon: '/img/marker.png',
//        title: 'Hello World!'
    });

    marker.addListener('click', function () {
        infowindow.open(map, marker);
    });

    marker.setMap(map);
}
You have to change some data in the above code. Edit myLatLng object with your coordinates. You can get them directly from google maps. Edit contentString with information about your localization. You can also change path to a marker image (commented in the above code).
To add javascript files to the contact page we override ContactContoller. If its not in your code, add following path override/contollers/front. If you already have ContactController.php file there, yust edit it. In other case create a new file. In the new file add folowing code:
<?php

class ContactController extends ContactControllerCore {

    private $googleMapsApiKey = 'xxxxxxxxxxxxxxxxxxxxxxxxxxxxxxxx';

    public function initContent()
    {
        parent::initContent();

        $this->registerJavascript(
           'google-maps-api',
           'https://maps.googleapis.com/maps/api/js?key='.$this->googleMapsApiKey.'&callback=myMap',
           ['server' => 'remote', 'position' => 'bottom', 'priority' => 999, 'attribute' => 'defer']
        );

        $this->registerJavascript(
           'google-map',
           'themes/TWÓJ_SZABLON/assets/js/google-map-contact.js',
           ['server' => 'remote', 'position' => 'head', 'priority' => 999]
        );
    }
}
Please remember to change value of googleMapsApiKey with your own key. Key can be obtained by following this instruction https://developers.google.com/maps/documentation/javascript/adding-a-google-map#key. Lihe before value of NAME_OF_YOUR_THEME has to be replaced.
In a case when file is edited just add lines responsible for adding javascript code and variable googleMapsApiKey.
        $this->registerJavascript(
           'google-maps-api',
           'https://maps.googleapis.com/maps/api/js?key='.$this->googleMapsApiKey.'&callback=myMap',
           ['server' => 'remote', 'position' => 'bottom', 'priority' => 999, 'attribute' => 'defer']
        );

        $this->registerJavascript(
           'google-map',
           'themes/TWÓJ_SZABLON/assets/js/google-map-contact.js',
           ['server' => 'remote', 'position' => 'head', 'priority' => 999]
        );
Additional information how to add javascript and css files in Presta Shop 1.7 can be found here https://developers.prestashop.com/themes/assets/index.html.
Remember to clean cache from your back office, and your map is ready on your shops contact page.